
At over 6 feet 3 inches tall, my client always felt as if he had to duck when walking through the narrow pass-through between the dining room and living room in his recently purchased retirement home. For this remodeling project, he not only wanted to expand the width of the opening to more than 8 feet, but he also wanted to raise the height of the opening as much as possible.
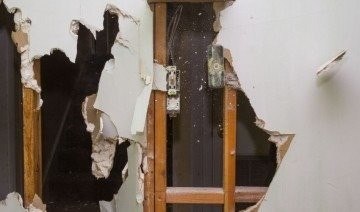
Dealing with a bearing wall. The first step was determining if the pass-through was in a load-bearing wall—I suspected it was. The home was a 1 1/2-story Cape, and the wall with the opening ran through the middle of the house, supporting the floor of the living space above. When I stripped the drywall from the studs, the solid header over the existing opening further confirmed my suspicions. The client had also removed ceiling drywall, in anticipation of a kitchen remodel, and the ceiling joists resting on the wall proved beyond a doubt that I was dealing with a load-bearing wall.
To modify the opening, I needed an engineer to spell out my options, and I needed to temporarily support the load on both sides of the wall. Because widening the opening would change the point loads, I also had to make sure that the loads would transfer directly to the main girder under the house. I took measurements in the basement to confirm that the side of the new opening would be sitting directly over the floor joists to transfer the load to the main girder.
Header strategies. To support the wider opening, I would need a longer header beam to replace the existing one. In these cases, there are two options for a new header beam: a carrying beam that supports the floor joists from below, or a flush beam that attaches to the ends of the joists via joist hangers.
Because a flush beam sits above the ceiling plane, it would have provided the maximum headroom. But retrofitting a flush beam would have required removing a lot of the ceiling to access the joists, which would then need to be cut back enough to slide the beam up to the subfloor above. Finally, after adding joist hangers, I’d need to put the ceiling material back.
All that extra work would have made a flush beam the more expensive option. A carrying beam, on the other hand, would require much less invasive carpentry than a flush beam. In addition, because it would be visible, a carrying beam would maintain the visual transition between dining room and living room that we wanted.
Engineering consultation. After deciding to use a carrying beam, I visited the structural engineering department at a local building supply company, Shepley Wood Products. The structural designer, Joe Madera, asked a few questions (building and room width, second-floor layout, and the like) and determined that a double 1 3/4-inch-by-7 1/4-inch laminated veneer lumber (LVL) beam would work for the new, 8 1/2-foot opening.
The original header consisted of two 2x10s below a double 2x4 top plate. Removing one of the top plates is allowed in the 2015 and 2018 code (IRC R602.3.2, Exception 3), so with the shorter LVLs, the bottom of the header would be more than 3 1/2 inches higher. LVLs were more expensive than 2x10s, but the client would be happy with the extra headroom.
Support walls and demo. With the drywall removed, my first task was constructing temporary support walls on either side of the location of the new opening. I measured and cut the vertical studs to fit snugly between top and bottom plates. To put them up, I first measured off the bearing wall top and bottom and set the bottom plate in place. After attaching the top plate to the two outermost studs, I folded in the studs slightly and positioned the top plate at my measurement on the ceiling. Then I just tapped the studs out until they were tight and vertical and added more studs as needed.
One word of caution. Be sure there is solid support above the top plate. In this part of the country, carpenters use furring strips on the ceilings below the joists. For the support against the dining room ceiling, I was careful to align the top plate with a furring strip.
Next, my assistant and I removed the studs across the width of the new opening. To keep things simple, we let an existing stud be the terminating point for the framed opening. After removing the studs and the header, I cut out the top plate with a reciprocating saw. On one side of the opening, we installed a king stud against the last existing stud. At the exterior wall, we put the king in on top of a short section of plate. After plumbing the kings and fastening them in place, we were ready to cut and assemble the beam.
Building the beam. We measured the distance between the kings and then cut the LVLs to length. Although LVLs are supposed to be very stable and these LVLs had been stored under an open cover, the ends had swollen significantly—perhaps as the result of wind-driven rain. I was able to cut the lengths I needed without using the bad ends.
The LVL engineering package included a connection diagram and fastening schedule. Madera told me not to bother gluing LVLs together because they are coated with paraffin, which keeps glue from adhering. We set one LVL on top of the other and laid out the fastener locations: 4 inches from the ends, 2 inches from the edges, and then 24 inches on-center in a 1-inch staggered pattern.
I was surprised at how few screws I’d need until I realized that the specs called for 3 1/2-inch FastenMaster FlatLok Engineered Wood Fasteners. After speaking with the engineer, I used what I had on hand—3-inch FastenMaster Guard Dog Exterior Wood Screws—doubling the number of screws and driving them from both sides.
Install the beam. LVLs have no crown, so I opted to place them with the manufacturer’s print right-side up. The engineering diagram called for two jacks to support each end, pretty common for spans greater than 6 feet. But it’s always good to check local code to be sure. I cut the jacks and set them within reach at each side of the opening.
My assistant and I raised the header in the opening, holding it in place up against the remaining top plate while we slid jacks under each end to take the weight. I had cut the jacks for a snug fit, so I needed to tap them into place with a hammer. With the jacks now holding the header beam in place, I tapped the beam into alignment with the wall framing and aligned the jacks with the king studs we had installed earlier.
Fasteners. Driving nails—either by hand or with an air nailer—can cause drywall fasteners to pop and electrical boxes to loosen. Instead, I opted to screw everything together with 3 1/2-inch hardened screws, breaking out my hammer only occasionally.
The first screws we drove anchored the king studs to the header beam. We also screwed the first jacks to the kings and toe-screwed the jacks to the plate at the bottom and to the header at the top. After tapping the second jacks into place, we fastened them in a similar fashion. Along the top of the header, we drove screws every 12 inches or so to anchor the header to the plate.
With all the fasteners driven, we removed the temporary support walls. Later, the opening would be plastered without trim per the client’s request. The rooms will have a much more open feel, and the big man won’t have to duck as he walks through the opening.
